How to Set Up Residential Proxies in BitBrowser (with Screenshots)
Published: 17 July 2026 · Tested on BitBrowser 7.1.4 (macOS) · Every step shown on a real profile
TL;DR: BitBrowser gives each profile its own fingerprint; a residential proxy gives it a trustworthy IP. In Browser Profiles → Add, set the proxy to Custom, Type HTTP, Host gw.roamproxy.com, Port 41080, Username = your Roam username + -country-us, add your password, click Check Proxy, then Confirm and Open to verify a residential exit.
BitBrowser is a widely used antidetect browser for managing many accounts, each in a profile with its own fingerprint. The fingerprint only holds if the profile also exits from a believable IP — a real residential connection, not the datacenter your machine runs on. Here's how to point a BitBrowser profile at a Roam residential exit, with no plugin required.
Step 1 — Get your Roam credentials
Sign up at roamproxy.com (300MB free, no card) and copy three things from the dashboard: your proxy username, your proxy password, and the gateway gw.roamproxy.com:41080. Append -country-<cc> to the username to choose the exit country, and -session-<id> to keep the same IP across launches.
Step 2 — Add the proxy to a profile
Open Browser Profiles and click Add. In the proxy panel, set:
- Method: Custom
- Type: HTTP
- Host:
gw.roamproxy.comPort:41080 - Username: your Roam username +
-country-us(add-session-<id>for a sticky IP) - Password: your Roam proxy password
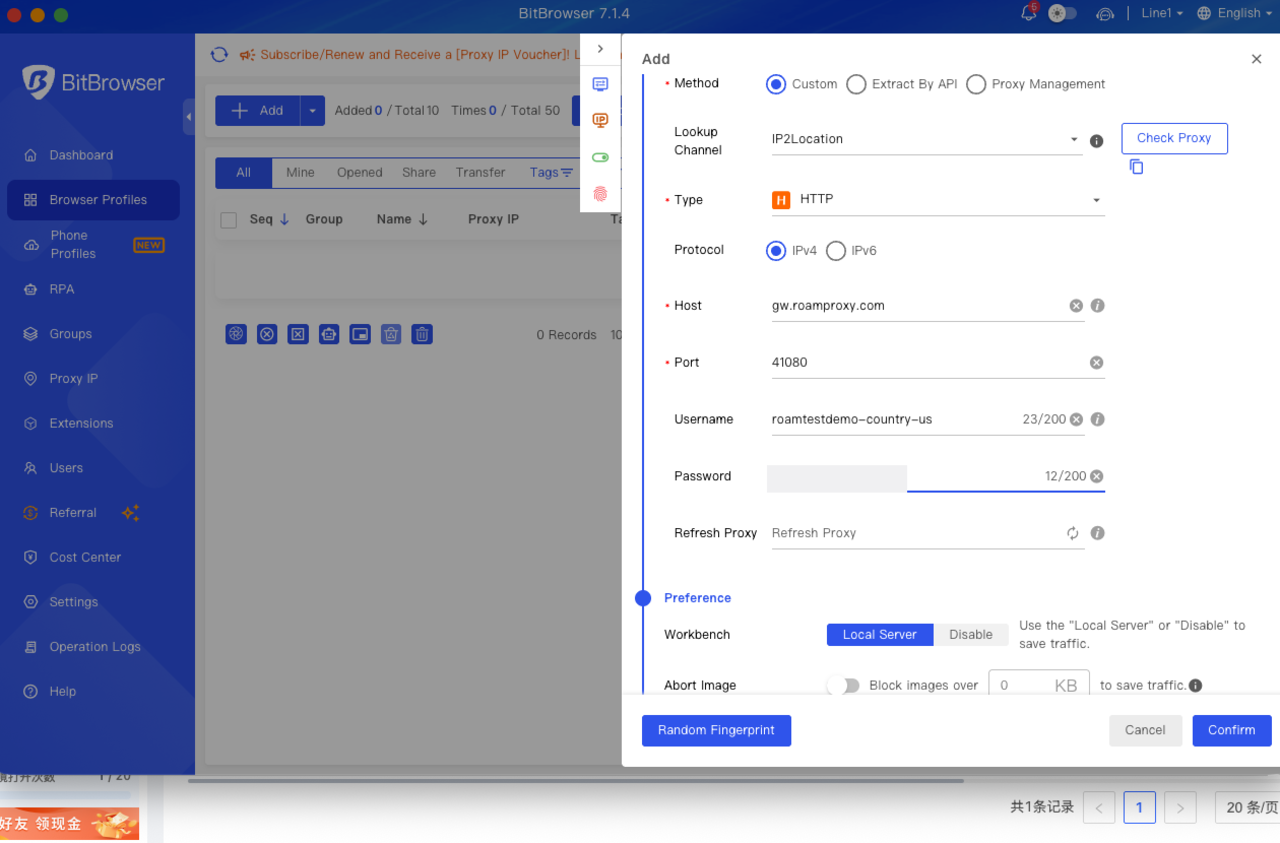
gw.roamproxy.com:41080, username pinned to -country-us.Step 3 — Check the proxy
Click Check Proxy. BitBrowser runs a live test and prints the exit IP with its country, state and city. Our demo exit resolved to the United States — Texas, Houston — confirming the credentials and country tag work before you launch anything.
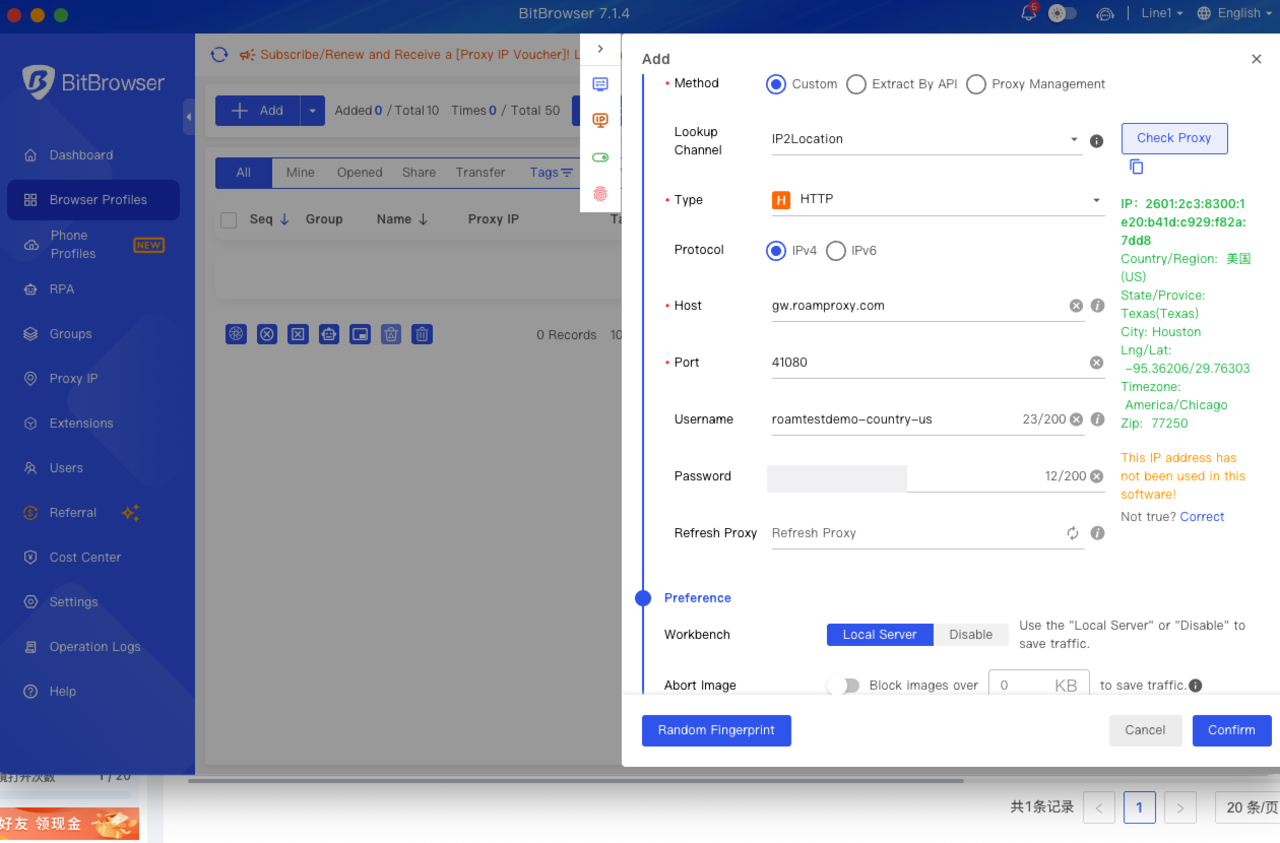
Step 4 — Confirm, open and verify
Click Confirm to save. The profile appears in Browser Profiles, tagged HTTP and ready to launch.
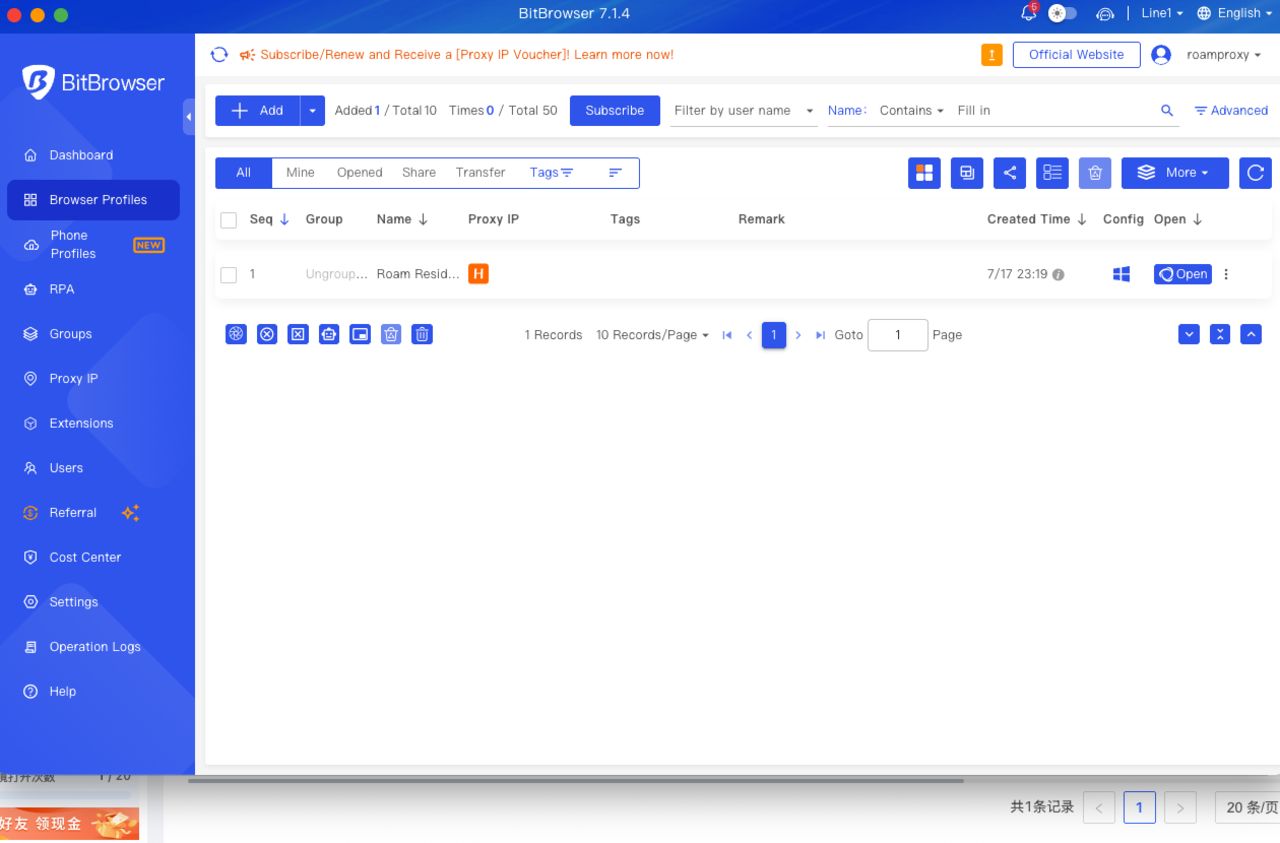
Hit Open, then visit an IP checker such as browserleaks.com/ip. The exit should be a real consumer ISP in your chosen country. In our run it came back as a US Charter/Spectrum residential cable line in Mount Sterling, Kentucky — note the .res.spectrum.com hostname, the mark of a genuine home connection.
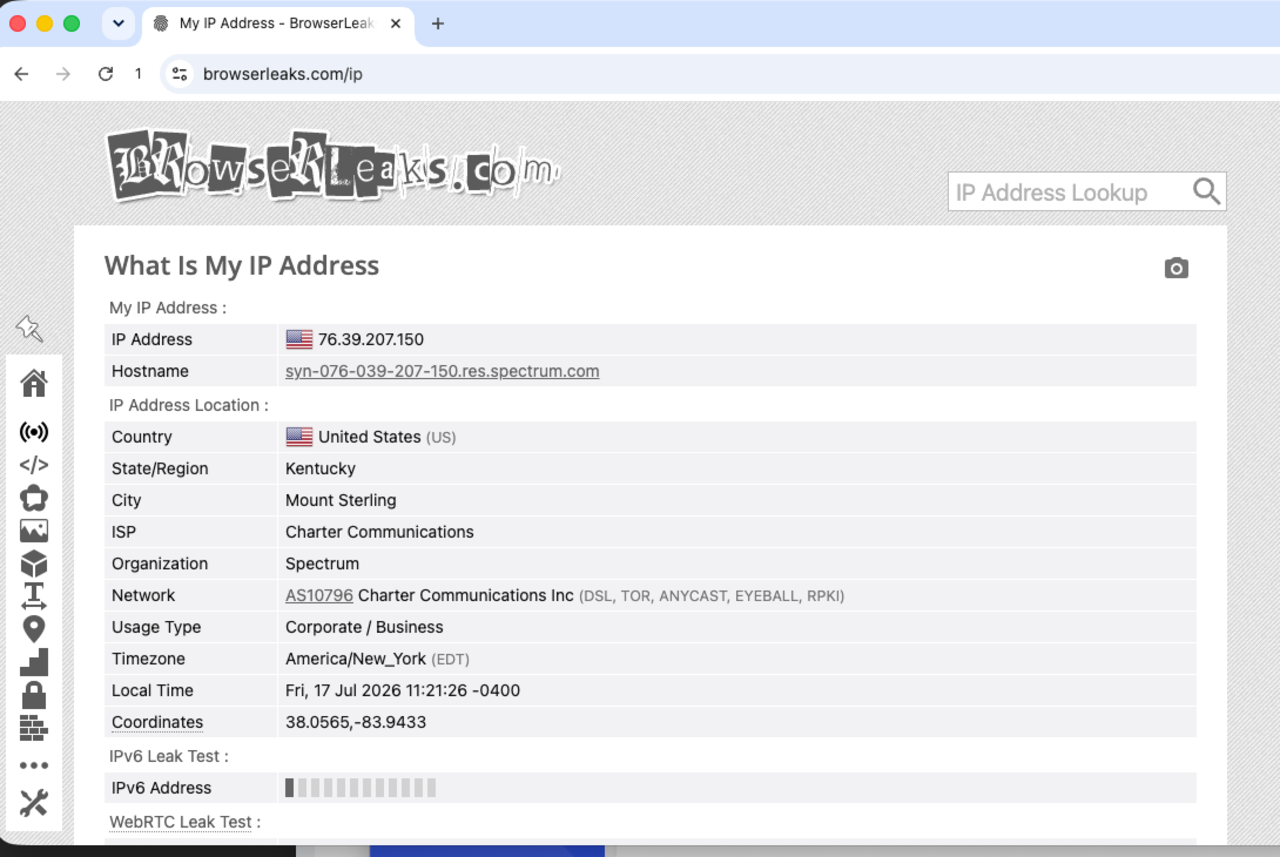
.res.spectrum.com — a real residential line.Rotate or keep the IP
The -session-<id> token controls stickiness. Keep it identical and the profile reuses the same residential IP every launch — right for accounts you sign into repeatedly. Change it for a fresh IP. For accounts you hold for months, a dedicated static residential IP ($4/IP/month) is more stable still. Keep one profile mapped to one exit; never share an IP across two BitBrowser profiles.
FAQ
Which proxy type should I use in BitBrowser for Roam?
Custom + HTTP. Host gw.roamproxy.com, Port 41080, Username = your Roam username + -country-<cc>, Password = your Roam proxy password. Use -session-<id> for a sticky IP.
How do I give each BitBrowser profile its own IP?
Use a different -session-<id> token per profile. Each token maps to its own sticky residential IP, so no two profiles share an exit. For long-lived accounts, assign a dedicated static residential IP instead.
Can I test BitBrowser + Roam for free?
Yes. Roam gives a 300MB residential free trial with no card required — enough to create a profile, run Check Proxy and confirm your residential exit IP before paying. After that it's $2/GB metered, no subscription.
Does Roam integrate with BitBrowser directly?
No plugin needed — Roam works as a standard HTTP proxy. Paste the credentials into the Add-profile proxy panel and it works. For bulk profiles you can script it via BitBrowser's local API; email support@roamproxy.com for help.
Give every BitBrowser profile a real residential exit: start with 300MB free — no card, then $2/GB metered with no subscription. Related: Hubstudio proxy setup · AdsPower proxy setup · GoLogin proxy setup.